

Build a Cupola Snow Shelter – Effective Protection in Winter Conditions

Cupola snow shelters
During military operation, the operator must constantly think about minimizing tracks that visually could be spotted from ground and air. And there is also the threat of technical equipment developed to spot heat and movement during bought day and night.
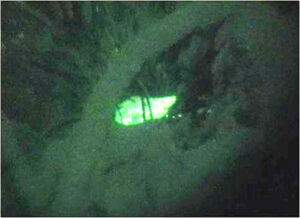
NVG detecting shelter
In the event of a compromise during a military operation that can lead to the operator having to move a DAR corridor back towards its own lines. Then it is a big difference compared to survival situations. In a “normal” survival situation, tracks and signs that are made increase the possibility for detection and rescue. This is something that the operator must avoid.
During the movement against own lines there can be nessesary to build some form of a shelter to rest and hide from hunter forces.
The Cupola Shelter is one option that gives good protection agains the elements and also against hunter forces. To minimize the risk of detection from UAV, helicopters, drones, and hunter forces with NVG/IRV the cupola snow shelter could be built. The benefits are that it becomes very hard for an enemy to locate the shelter whit modern IR equipment and the shelter itself gives much better protection against the second enemy – coldness – compared to a snow trench.
After deciding on the area for the shelter, it is vital that the main ski track is left in a way that an enemy immediately shouldn’t discover the shelter location. This means that a set of false tracks must be made and a so-called jump off, whit extremely good camouflage work, must be done.
The incoming track towards the shelters area should be minimized to one track, drawn with the air threat in mind. The incoming ski tracks’ edges should also be camouflaged / beveled. This will reduce the risk of detection of the track. All necessary building materials for the shelter are to be taken along this track.
Track discipline is vital. Try to ski without using the poles. Avoid disturbing the snow along the track, do not knock down snow that is piled on trees. Track discipline reduces the amount of camouflage work that must be done.
All sawing of branches used for the construction of the cupola should be made well under the snow line and camouflaged afterward. If spruce tree branches are needed, they should be taken from several trees.
The shelters should be placed in a concealed place. The incoming track should be placed, so it gives a head warning for the operator/-s if someone is tracking along the incoming track.
Before starting whit, the shelter establishes a LUP with fire positions and sits down for approximately 30 minutes and just listen to if there is any enemy activity in the area. Select an equipment place in the LUP. This reduces the risk of accidentally losing equipment that is covered by snow. The ski cash (individual or team cash) is placed near the equipment place.
The building of the Cupola snow shelter is made in phases and with a minimum of tracks around it and the LUP.
Phase 1 Starting with preparation for the build
Make a track approximately 1 meter wide and 10 meters long (if snow deep is around 60 cm) by walking in the snow from the equipment place. The aim is to get the snow crystals to form harder snow that is to be used during the construction of the cupola shelter. The track should be U-shaped and smooth when finalized without any sharp edges.
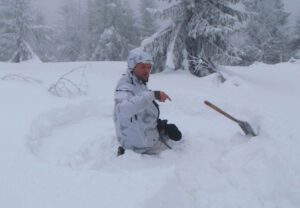
The wideness for one-two man’s cupola snow shelter site
The Cupola snow shelter’s location is to be compressed in the same way as the track to it. Then smooth out. Then leave the site so the snow freezes and gets hard enough so blocks could be cut out with a shovel, Laplander saw or knife.
Phase 2
When the snow gets hard enough, the digging starts in the cupolas rounded site. Dig out bent shaped blocks and place them along the incoming track from the LUP. Here the blocks freeze together and harden even more.
Do not dig all the way down to the ground. It is better to have 10-20 cm thick snow on top of the frozen ground. Then the floor and sides in the round cupola site is finalized it is time to start with the framework that will support the wall of the Cupola.
Branches are pressed into the hard snow and bent together to form the Cupola.
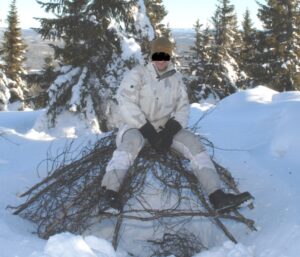
The frame will hold a empressive amount of weight.
To strengthen the frame, some branches also are to be woven horizontally into the cupola frame. Since the round edge is hard, it will hold the weight of a person during construction work. Do not step out into the softer snow and ruin the camouflage. Then the frame is covered whit a shelter sheath, tarp or spruce tree branches. The benefit of using a shelter sheath or tarp is that it will protect against water dripping from the snow that is to cover the cupola if it gets warmer. It also allows the use of light inside the cupola. Since sheaths and traps reduce the risk of light leaking through the walls of the cupola.
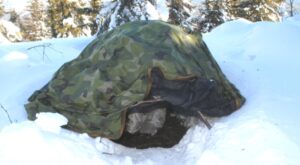
Cover the Cupola frame whit a tarp
Phase 3
After the tarp has been secured, the snow blocks are placed around the frame. The hard snow surface, between the frame and loose snow, is now perfect for the one that is placing the block. Finalize half of the blocks and then collect loose snow from the edges of the hard track that has been made from the equipment place to the cupola. A bivy bag or backpack liner is useful to collect and carry the loose snow in. To camouflage the snow surface on front of the cupola, it looks like the undisturbed surrounding snow, using a thin sweater on a ski pole is dragged gently over the surface
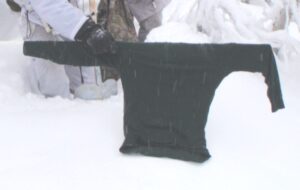
The final touch
After the front side of the Cupola is finished see to it that the backside whit the entrance is made in the same way. First with blocks that have been cut out of the harden track and finally covered with loose snow. The entrance is left open.
For security reasons, a ventilation hole is made and if the prone position is not the preferred position when sleeping holes into the snow wall is made.
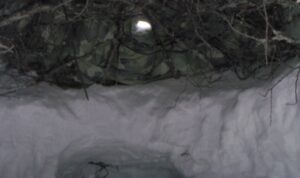
Ventilation in the wall
Now it is time to bring in the spruce branches to isolate the floor and sides inside the cupola. Stick the branches down into the floor, so it becomes a lifting effect for the kip mat or body if lacking a kip mat. This creates an air gap between the snow and prevents direct contact whit the snow floor and wall when sleeping or sitting inside the cupola.
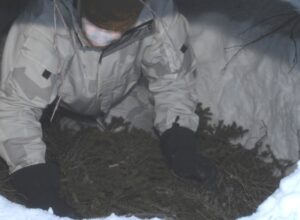
When you think it is thick enough, double it.
Phase 4
The door for the entrance is made from a block of snow that is taken from the hardened track. After making the door it should be left standing for some time to harden before placed in the entrance.
Finally, the track and surroundings should be smoothened so there are no sharp edges. By doing this it will be much harder to spot the track from the air or ground.
And wind that drifts snow will much faster cover the track made. It is also very important that the door is made of a snow block. Otherwise, it will give away the entrance and there will be colder inside the cupola. If there is the possibility of getting someone to cover the entrance whit loose snow it will be nearly impossible to detect the cupola, even from close range.
And now you will be able to use light during the nighttime.
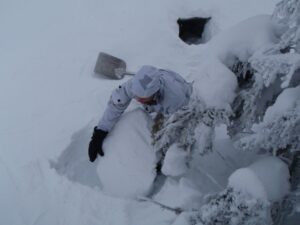
The door is a snow block made from the harden track
When opening the door ether from the inside or outside it is recommended to use a Laplander saw. This reduces the risk of breaking the door that is made of snow. Do not use a backpack cover in white.
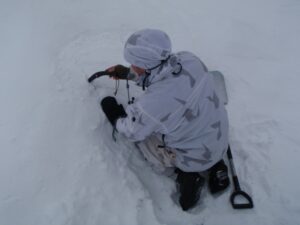
When opening the door use a Laplander saw
Inside the cupola there will be a huge difference in temperature after a while. It will be around a couple of minus degrees Celsius and sometimes it drops around 0 degrees Celsius depending on the outside temperature.
This environment is much better than the one you have on a snow trench. The Cupola snow shelter will preserve your physical stamina and protect you against the elements and technical surveillance equipment that is one of the modern arctic soldier new challenges.
Back to Articles & News